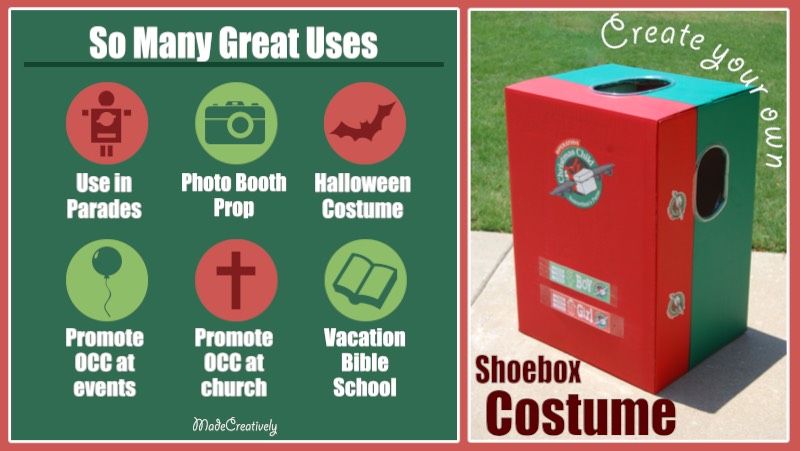
Make your very own Operation Christmas Child shoebox costume! Wear it for Halloween, to OCC benefit events or simply to promote OCC during National Collection Week. All you need are a few supplies and a willing person to wear it. Our costume has received countless comments and received a lot of attention when being worn. Kids love it! Franklin Graham even signed the front of our shoebox costume!
Supplies:
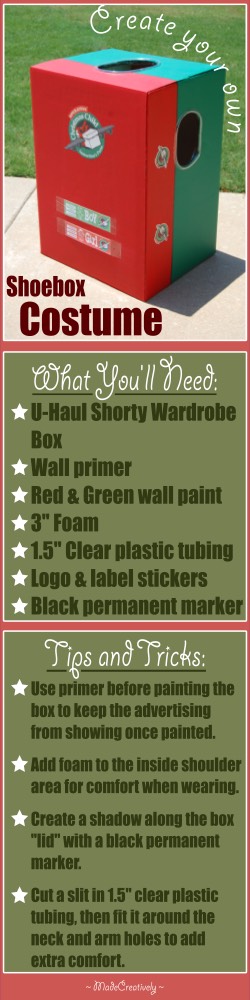
- 1 U-Haul Shorty Wardrobe Box
- Packing tape / duct tape
- Wall primer
- Red paint
- Green paint
- Paintbrush
- Scissors
- Utility knife
- 2 good-sized pieces of 3″ foam
- Several feet of 1.5″ clear plastic tubing
- Black permanent marker
- Oversized OCC logo and Boy/Girl labels
Warning: Utility knives are sharp! Adult supervision is recommended.
Directions:
- Assemble the wardrobe box and fold one end’s flaps inward (this will be the bottom of the shoebox costume). Securely tape the inward-folded flaps all remaining seams on the INSIDE of the box using packing tape or duct tape.
Note: If you add tape to the outside of the box, you won’t be able to paint over it! - Paint the exterior of the box with wall primer to cover up all advertising and wording, leaving you with a solid white box. Several coats may be needed. Let dry completely.
- Draw a light line along the sides and top of the box to mark where the “lid” of the box will be located. Using red paint, cover the “lid”-side of the box with several coats. Let dry completely.
- Paint the remaining white portions of the box with green paint. Several coats may be needed. Let dry completely.
- Using the black permanent marker, carefully draw a line along the sides and top of the box where the red and green paints meet. This makes it easier to differentiate the “lid” and “base” of the shoebox.
- Use a pencil to trace an opening for the head / neck on the top of the box as well as arm holes on both sides. Placement and size of these holds depends on the size of whoever will be wearing the costume. Carefully use the utility knife to cut out all three openings.
- The cardboard edges of the openings can be rough and scratchy, especially around the neck, so let’s add some comfort. Measure the circumference of each opening and cut a piece of plastic tubing for each. Using scissors, cut along the length of each tubing piece to form a C-shaped piece of plastic. Wrap the tubing around each opening.
- By now you’ve probably tried the costume on… and you look great! It’s heavier than you thought, right? For even more comfort, attach two good-sized pieces of 3″ foam inside of the box on either side of the neck opening to form shoulder pads.
- Last but not least, print an oversized OCC logo and Boy/Girl labels on a sheet of label / stcker paper. Attach them to the box in the center of the red “lid”.
- Last but not least, try on your new Shoebox Costume!
Are you hosting a shoebox party? Check out our line of Shoebox Party Products!